

I have seen lots of these on pinterest and I just had to have one for the Ice Cream Party. I figured it would be a prefect way to display our games prizes.
You will need:
A frame
Some wire netting (Mine came in a roll - from a garden centre or a DIY shop)
A staple gun
Clippers
I strongly advise on wearing DIY gloves and long sleeves if you want to avoid getting scratches...
How to:
First thing is to use the clippers to cut a piece of wire netting slighly bigger than the frame (maybe a couple of inches bigger in each direction).
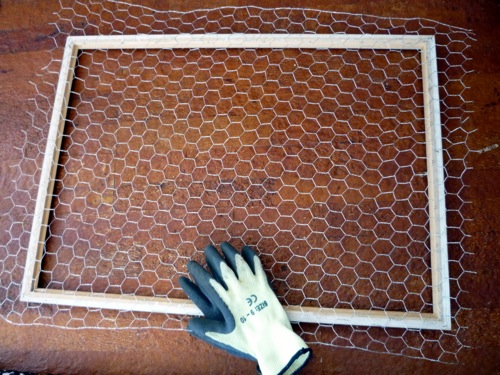
Then "work" the netting to try and flatten it. You may roll it, strech it, jump on it if you want (or maybe not) ! You simply want the the netting to lay as flat as possible.

If your frame is small, you can simply hot glue the wire netting at the back of the frame like I did for this Earring Holder.

However as my frame was quite big (60 x 80 cm) I decided on using a staple glun so I could strech the netting better while working.
I stapled one side then stapled the opposite side, streching it as much as I could.
I then stapled the two remaining sides, still streching as I went.

I don't think you can ever get a completely flat netting if it came from a roll but by doing it this way the end result looked good to me.
Clip the extra netting to size.
While looking on the web for instructions on similar projects, I read a few people complained about the netting marking their wall (metal wire on paint=grey marks). If your project is intended for indoor use, simply cover the wire netting "edges" with ribbon like I did here (I hot glued the ribbon):

My project was hung on our shed so I skipped this last step.
Come back later this week for the DIY to make those sweet little treat bags !

Linky Parties


No comments :
Post a Comment